ETag implementation in ASP.Net Core - Part 2
Saturday, 21 August 2021
In part one we discussed HTTP ETag mechanism. In this part we are going to implement an APS.NET core application that uses ETag.
For starters, let's create an empty WebAPI project by issuing the following commands
mkdir ETag
cd ETag
dotnet new webapi -n ETag
Now let's cleanup what the default template has generated for us. First open Startup.cs and modify content of Configure method as this
public void Configure(IApplicationBuilder app, IWebHostEnvironment env)
{
    if (env.IsDevelopment())
    {
        app.UseDeveloperExceptionPage();
        app.UseSwagger();
        app.UseSwaggerUI(c => c.SwaggerEndpoint("/swagger/v1/swagger.json", "ETag v1"));
    }

    app.UseFileServer();
    app.UseRouting();

    app.UseEndpoints(endpoints =>
    {
        endpoints.MapControllers();
    });
}
Now it's time to get rid of all tings related to WeatherForecast (class, controller, ...)
Now let's create a model class inside a folder called Models. Create a file called Data.cs and create a class inside it
public partial class Data
{
    public int Id { get; set; }
    public int Value1 { get; set; }
    public DateTime Value2 { get; set; }
    public List<Guid> Tokens { get; set; } = new List<Guid>();
}

partial class Data
{
    private static Data data = new Data();
    private static Timer timer;
    static Data()
    {
        timer = new Timer();
        timer.Elapsed += (sender, e) => LoadData();

        LoadData();
    }
    public static Data GetData()
    {
        return data;
    }

    private static void LoadData()
    {
        timer.Stop();

        Random rnd = new Random(DateTime.Now.Millisecond);
        data.Id = rnd.Next();
        data.Value1 = rnd.Next();
        data.Value2 = DateTime.Now;

        data.Tokens.Clear();
        for (int i = 0; i < 50; i++)
            data.Tokens.Add(Guid.NewGuid());

        timer.Interval = rnd.Next(5000, 10000);
        timer.Start();
    }
}
Data class has been split into two parts in order to manage things easier. The first part contains only data and the second part contains actions.
The idea is to simulate a single entity that changes overtime (5 to 100 seconds randomly).
Out API needs a controller which is added to the project by adding DataController.cs. Only on action method is needed inside this controller
[HttpGet]
public Data Get()
{
    return Data.GetData();
}
Now the last part is adding front-end stuffs inside wwwroot folder. We need two files here: index.html and axios.min.js. The HTML file only contains the required stuffs. It fetches data from our API using Axios library.
<!DOCTYPE html>
<html lang="en">
<head>
    <meta charset="UTF-8">
    <meta http-equiv="X-UA-Compatible" content="IE=edge">
    <meta name="viewport" content="width=device-width, initial-scale=1.0">
    <title>ETag Test</title>
</head>
<body>
    <pre id="output"></pre>
    <script src="axios.min.js"></script>
    <script>
        window.addEventListener('DOMContentLoaded', (event) => {
            const output = document.getElementById("output");
            axios
                .get('/data')
                .then((response) => output.innerText = JSON.stringify(response.data, null, 4))
                .catch((error) => output.innerText = "AN ERROR OCCURED !!!");
        });
    </script>
</body>
</html>
Now we can test our application at this stage. By running the application we can navigate to http://localhost:5000 to see the result. Here is a screenshot of the Network tab in Firefox developer tools.
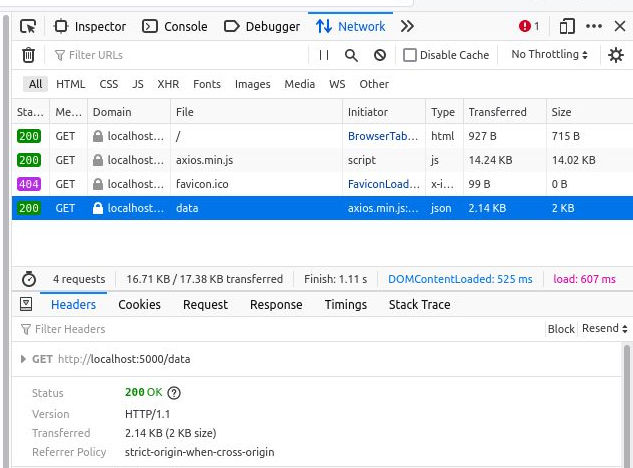
As the image shows, the request to /data route returns with status code of 200. The resource size is 2KB and totally 2.14KB transferred. If you refresh the page, nothing will change.
In the next part we will implement ETag mechanism in out project.